How to Withdraw Crypto From Exchanges to Self‑Custody Canada 2026: Step‑by‑Step Guide, Common Pitfalls and CRA Record‑Keeping
If you want to withdraw crypto from exchanges to self‑custody in Canada 2026, this guide walks you through every step with Canadian examples, clear safety checks, and the CRA record‑keeping you need. "Withdraw crypto from exchanges to self‑custody Canada 2026" is a common, high‑intent search for Canadians who bought crypto on an exchange and now want to control their keys. Below you will find a practical checklist, numbered steps, a chain selection comparison, and exactly what to save for CRA ACB tracking.
Table of Contents
- Why move crypto off an exchange?
- High‑level risks and CRA tax context
- Before you start: checklist (do not skip)
- Step‑by‑step: Withdraw crypto from exchange to self‑custody
- 1. Prepare and verify your receiving wallet
- 2. Create and label a receiving address
- 3. Confirm chain and token compatibility
- 4. Check memo/tag requirements
- 5. Use withdrawal whitelisting and 2FA
- 6. Send a small test transaction (recommended amount)
- 7. Verify on‑chain and release the full amount
- 8. Record‑keeping for CRA and future ACB
- Common pitfalls and how to avoid them
- Special cases: stablecoins, wrapped tokens, and bridging
- Safety practices and recovery drills
- When something goes wrong
- Quick decision table: transfer now or keep on exchange?
- FAQ
- 1. Is withdrawing crypto from an exchange to my wallet taxable in Canada?
- 2. What if the exchange offers multiple chain options for the same token?
- 3. How much should I send for a test transaction?
- 4. Can I withdraw to a custodial wallet or another exchange?
- 5. How long will withdrawals take?
- Conclusion and next‑step checklist
Why move crypto off an exchange?
- Self‑custody gives you sole control of private keys and reduces counterparty risk if an exchange is hacked or freezes withdrawals.
- It enables long‑term custody strategies like multisig, hardware backup, or running your own node for some assets.
- You avoid counterparty custody fees and withdrawal freezes, a recurring risk for Canadian holders.
High‑level risks and CRA tax context
Moving crypto from an exchange to your own wallet is generally a non‑taxable internal transfer in Canada, but you must keep records so future disposals calculate capital gains correctly. See practical guidance on CRA crypto tax reporting and ACB for record requirements, software tools, and examples you should save after each withdrawal.
Before you start: checklist (do not skip)
- Set up a hardware wallet or secure non‑custodial wallet and back up seed phrases.
- Create an account diagram and label addresses (e.g., "Ledger — ETH main" ).
- Enable strong 2FA and withdrawal whitelisting on your exchange account.
- Read the exchange withdrawal instructions for token-specific requirements (memo, tag, chain options).
- Plan to send a small test transaction first — always.
Step‑by‑step: Withdraw crypto from exchange to self‑custody
1. Prepare and verify your receiving wallet
Use a reputable hardware wallet (Ledger, Trezor) or a well‑audited software wallet. If you are using a hardware device, complete initial setup and backup recovery phrase before any transfers. For advanced loss prevention, review hardware authenticity steps in the hardware wallet verification guide: verifying hardware wallet authenticity and firmware.
2. Create and label a receiving address
On your wallet, generate a new receiving address for the specific asset and chain. Do not reuse addresses without intent. Copy the receiving address only from your hardware/software wallet while it is connected and verified on screen; do not copy from browser history or untrusted apps.
3. Confirm chain and token compatibility
Many tokens exist on multiple chains (for example USDC on Ethereum, Polygon, Solana, or Avalanche). Exchanges often present chain options labelled as ERC20, BEP20 (BSC), TRC20, OMNI, SOL, etc. Choosing the wrong chain can permanently lose funds. Use the table below to compare common chains at a glance.
| Chain | When to use | Pros | Cons |
|---|---|---|---|
| ERC20 (Ethereum) | Default for most tokens and DeFi interactions | High compatibility, well supported by wallets | Higher gas fees |
| Polygon (MATIC) | Low fee alternative for some ERC20 tokens | Low fees, faster | Some exchanges/wallets do not support deposits/withdrawals |
| BEP20 (BNB Chain) | Popular for lower‑fee USDT/USDC transfers | Low fees, fast | Less compatible with Ethereum‑native tooling |
| SOL (Solana) | Solana tokens only | Very low fees and high speed | Different wallet format and recovery practices |
4. Check memo/tag requirements
Some assets require a memo, tag, or destination tag (XRP, XLM, BNB, XMR exchange memo, etc.). If your wallet does not support memos for that asset, do not withdraw. Missing memo is a frequent cause of lost funds.
5. Use withdrawal whitelisting and 2FA
Enable address whitelisting and ensure the receiving address you added is confirmed via email / 2FA steps required by the exchange. This prevents an attacker from changing the destination during a session.
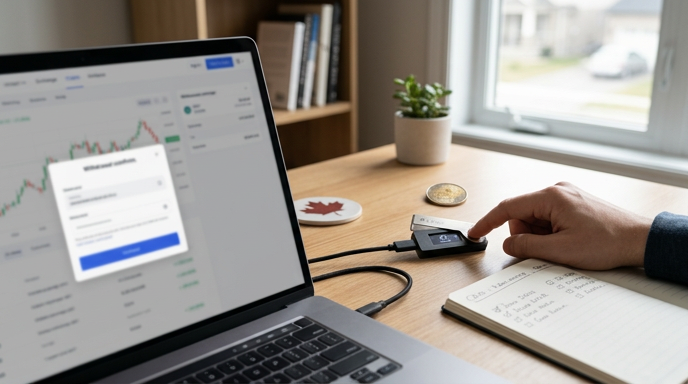
6. Send a small test transaction (recommended amount)
Always send a small test amount first — typically 0.1 to 1 percent of the total, or a minimum that covers network fees (for BTC, ETH etc.). Wait for the required number of confirmations listed by the exchange and verify the arrival on your wallet using a block explorer.
7. Verify on‑chain and release the full amount
Confirm the test transfer shows the correct address, amount, and token contract on the block explorer. If everything checks out, proceed to withdraw the full remaining balance. Keep an eye on network fees - consider timing around lower fee periods for Ethereum.
8. Record‑keeping for CRA and future ACB
Save a screenshot of the exchange withdrawal request, the exchange transaction ID, the receiving wallet address, and the block explorer transaction hash. Although moving funds to your own wallet is not a disposal, you must retain these records so your adjusted cost base (ACB) continuity is clear for future capital gains calculations. See the detailed CRA reporting guide here: CRA crypto tax reporting and ACB.
Common pitfalls and how to avoid them
- Wrong chain selection — always check the chain label and wallet compatibility before sending.
- Missing memo/tag — many exchanges do not automatically add memos for deposits; copy the memo exactly.
- Sending to an exchange deposit address — do not send funds intended for self‑custody to an exchange deposit address.
- Not testing small amounts — skipping a test tx is the most common irreversible mistake.
- Poor documentation — if you cannot prove continuity of ownership, CRA audits become harder.
Special cases: stablecoins, wrapped tokens, and bridging
Stablecoins (USDC, USDT) and wrapped tokens can exist on multiple chains. If you plan to use DeFi later, choose a chain that your wallet supports and where you will interact. If you must move across chains, use trusted bridges and understand bridge risk. For DeFi on‑ramp and bridging practices, review our DeFi on‑ramp guidance and pick an exchange carefully — consider options in selecting a Canadian exchange with CAD support.
Safety practices and recovery drills
After transfers, test recovery and backup procedures in a safe way. Run a disaster drill to verify seed backups work as intended — this is covered in detail in the backup testing guide: backup testing and disaster drills. Regularly verify device firmware and only update from official vendor tools to avoid supply‑chain risks.
When something goes wrong
If a test transaction fails or funds never arrive, immediately contact the exchange support with your withdrawal ID, screenshots, and transaction hash. If the exchange freezes withdrawals for your asset, review contingency steps and legal options; see practical advice on what to do when an exchange freezes withdrawals.
Quick decision table: transfer now or keep on exchange?
- Small active trading positions — keep on a reputable exchange for convenience, but keep only what you need.
- Long‑term holdings — move to self‑custody (hardware wallet + backup) to reduce counterparty risk.
- Large balances — consider multisig or institutional custody and professional advice.
FAQ
1. Is withdrawing crypto from an exchange to my wallet taxable in Canada?
No — moving crypto between your accounts is typically a non‑taxable transfer. However, you must keep complete records (transaction IDs, timestamps, and the amount) so your adjusted cost base remains accurate for future disposals. For full details, see our CRA reporting guide: CRA crypto tax reporting and ACB.
2. What if the exchange offers multiple chain options for the same token?
Choose the chain that your receiving wallet supports. If you are unsure, use ERC20 for Ethereum‑native tokens unless you plan to use a specific low‑fee chain and your wallet supports it. When in doubt, contact exchange support and do a small test withdrawal first.
3. How much should I send for a test transaction?
A small amount that covers network fees but is meaningful enough to confirm token and chain compatibility — typically 0.1 to 1 percent of the total or the token's minimum withdrawal amount. For Bitcoin, consider 0.001 BTC; for ETH tokens, 5–20 USD equivalent often suffices.
4. Can I withdraw to a custodial wallet or another exchange?
Yes, but treat inter‑exchange transfers as potentially risky due to deposit memo/chain mismatches. For self‑custody goals, always withdraw to a wallet where you control the private keys.
5. How long will withdrawals take?
Time depends on network congestion and the exchange's confirmation policy. Bitcoin and Ethereum can take from minutes to hours; some chains like Solana are much faster. Exchanges may also batch withdrawals which can add delay.
Conclusion and next‑step checklist
Withdrawing crypto from an exchange to self‑custody in Canada is straightforward if you follow a disciplined process: prepare a verified receiving address, confirm chain and memo requirements, send a test transaction, and keep thorough records for CRA and future accounting. Below is a short checklist to follow immediately.
- Set up and verify a hardware wallet or secure non‑custodial wallet.
- Enable 2FA and withdrawal whitelisting on the exchange.
- Generate and label a new receiving address. Verify on device screen.
- Confirm correct chain and memo/tag requirements on the exchange.
- Send a small test transaction. Verify on a block explorer.
- Send the remaining funds. Save withdrawal ID, TX hash, and screenshots.
- Update your ACB records and backup verification logs.
If you handle hardware wallet setup or backup testing next, see the detailed guides on verifying device authenticity and running recovery drills to complete a robust self‑custody strategy: hardware wallet verification and backup testing and disaster drills. For tax questions, consult the CRA guide or a professional: CRA crypto tax reporting and ACB.